Sunday, March 25, 2012

Pizza Bianca

It's one of the great culinary creations of Italy. Airy, crispy, salty, delicious slabs of Italian not-too-flat-bread. Delightful plain, it can be cut open and turned into a sandwich, and in the hands of contemporary masters like Gabriele Bonci in Rome it becomes a canvas for greatness. Here he is on Italian TV:


Unfortunately, you can't make it here. Wrong flour, wrong yeast, wrong water, wrong mixer, wrong, wrong wrong. Don't believe me? Check out this 50+ page discussion: Pizzarium. Fortunately, mere mortals can make a fairly reasonable substitute with a little patience.

Basic Pizza Bianca:

500 grams bread flour
400 grams water
10 grams Kosher salt
1 packet active dry yeast (purists will use about a quarter tsp.)
2 Tbs Extra Virgin Olive Oil plus more for oiling the bowl and brushing
Sea Salt for sprinkling

Day 1

Pour yourself a glass of wine. Set it in a safe place.

Weigh out the flour, water and salt. Place them with the olive oil and yeast in the bowl of a heavy duty mixer and stir them with a fork until the dough begins to come together.


Mount the dough hook on the mixer, lock the mixing bowl in place and turn it up to about 80% power. On my KitchenAid that's 8. Knead the dough for 15 minutes. Really. At this speed the mixer will tend to "walk" so keep a hand on it and sip your wine. After about 12 minutes or so the dough hook will start flinging stringy blobs of dough toward the top couple inches of the mixing bowl. If it looks like it's getting out of hand, just scrape it down and keep mixing.

Almost ready...

Lightly oil a 5 quart mixing bowl and dump your dough into it. Oil your hands and gently form the blob into a ball, turning it to coat it with oil. It will immediately turn into a puddle. Cover the bowl and put it in the refrigerator for 24 hours.
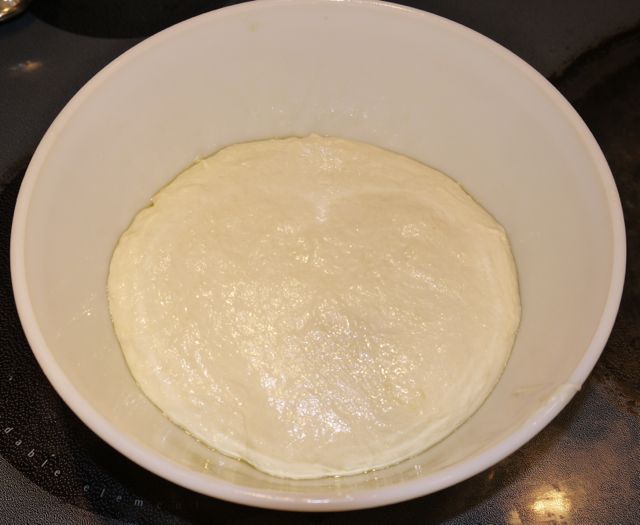


Day 2

When you take the bowl of dough out it should look like this:


Flour your work surface and hands and pull the dough out of the bowl. Gently pat it into a rectangle, then fold one end to the middle and the other over that. You'll end up with a roughly square blob one third the size of the original rectangle. Put the folded dough back in the bowl, cover and leave it for an hour. (Purists will put it back in the 'fridge for another 24 hours.)

Make a rectangle
Fold one side to the middle
Fold the other side over the top
Repeat the folding process twice more, making a quarter turn each time, for a total of 3 hours of rising.

Lightly oil a 10x15 inch jelly roll pan including the sides. Oil your hands and turn the dough out into the center of the pan. Very gently stretch the dough into a rectangle and ease it toward the edges of the pan. It's better to pick up half and stretch it than to press it down. You want to avoid crushing the bubbles you've spent the last three hours cultivating. It will just about fill the pan. Cover it and set it aside in a protected place for an hour (a large jelly roll pan will sit nicely over the medium one without touching the dough).

While the dough rises for the final time, place a rack in the middle of your oven and preheat to 500 F. for an hour.

Uncover the dough, gently brush it with a little olive oil, and sprinkle with sea salt.

Oiled, salted and ready for the oven
Pop it into the oven and bake it for 12-15 minutes until it's nicely colored.


Let the pizza bianca cool for a few minutes and then turn it out onto a rack. When it's cool enough to handle cut it into 8 more or less equal rectangles.  You can eat it plain with a little oil for dipping, split and stuffed with a little mortadella and some salad greens, tomato/basil/mozzarella, or whatever else looks good to you. Just don't overdo it - the main event is the bread.

Cut into serving pieces.


Thursday, March 22, 2012

Cima di Rapa!

Cima di Rapa Quarantina
That was quick! The cima di rapa we planted on the 18th is already up. The seed packet claims it will be ready to eat in 28 days. Those "days to harvest" claims are usually pretty optimistic but I'm starting to believe this one.

Monday, March 19, 2012

Gardening 2012 - Transplants & Raised Beds

A month ago I wrote about the beginning of the new gardening year. For the last week or so we've been transplaning the seedlings into (mostly) individual pots. Now that everything is transplanted it looks like this:


The two pots in the front with nothing in them are just planted zucchini. Everything else is pretty obvious: Tomatos are on the left, basil, parsley and thyme here and there, eggplant and peppers on the right.

We've built a new raised bed frame this year.  In the past we've avoided using presure treated lumber since it used an arsenic based compound. These days a less toxic copper formulation is used, though leaching is still a potential issue. As a result, we'll grow only leafy plants there this year.

Fortunately, the materials are still pretty cheap. For our 18 square foot bed two 12 foot 2x6 boards and a single 8 foot 2x2 cost $17.93. We had them cut the 2x6 boards in half - just the right size for a 3 x 6 foot bed and also just the right size to fit in our Mini. I cut one in half to make the ends of the bed frame:


The copper in the treated wood means that you need to used stainless steel or hot dipped screws to hold everything together. I happened to have some treated deck screws left over from another project but if you don't you'll need to buy a few - 16 three inchers will do the trick.

With the bed in place we added a couple .75 cubic foot bags of dried manure and half a bag of peat moss to the surprisingly sandy soil next to the garage. This is the only place left in our little urban lot that gets anything close to full sun.


It doesn't look like much now, but there are three rows of cima di rapa there - the white PVC pipe marks where the next row will start. Given the price of broccoli raab around here that already more than pays for the materials that went into the bed.

Thursday, March 8, 2012

Pasta e Fagioli

There are dozens of recipes for Pasta e Fagioli floating around, most of which include onion/carrot/celery soffritto, various herbs, and even meat. This recipe however places the beans at center stage, augmented by only the mildest of seasoning.


Ingredients

1 cup dried white beans
2 tbsp olive oil
2 or 3 fresh sage leaves, coarsely chopped
1 garlic clove, minced
3 tbsp tomato puree
½ cup small pasta like ditalini
Salt and pepper

Method

Soak the beans in cold water to cover for 10-12 hours. If you start them on your way out the door in the morning, they'll be ready when you get home from work.  

Drain the beans, put them into a saucepan (a three quart pan is just right) and add enough water to completely submerge the beans. This water also cooks the pasta so use plenty. You can always remove some later. Bring the water to a boil and reduce the heat to a simmer. Skim off any scum that comes to the surface. The beans are done when they have completely softened and begin to break apart - start checking them after about 30-40 minutes.

When the beans are done adjust the amount of bean water - you want enough to cook the pasta and make a not-too-thick soup. Then scoop out about half the beans and mash them into a puree in whatever way is convenient - food mill, blender, food processor, etc. An immersion blender works well, but be careful - you want lots of whole beans left. Add the pureed beans back into the pan

Heat the oil in a small pan and fry the garlic and sage until the garlic begins to color. Transfer the garlic, sage, and oil mixture to the beans. Add the tomato puree.


Bring the bean mixture back to a gentle boil and add the pasta. When the pasta is done to your taste, adjust the seasoning with salt and pepper and enjoy.


LinkWithin

Related Posts Plugin for WordPress, Blogger...