Showing posts with label recipe. Show all posts

Friday, March 27, 2015

Terrine de Foie Gras


Expensive? Yes. Delicious? Yes. Hard to make? Nope. Terrine de Foie Gras is just about the easiest of the old time “haut cuisine” dishes to make. Just duck liver (the foie gras) a little sweet wine, salt and pepper. Here’s how it works:

The Liver

This is by far the hardest part: cutting out the various veins and nerves. And it’s not really hard, just messy and time consuming. Neatness doesn’t really count since we’re going to jam everything into the terrine anyway.

You end up with a pile of liver and a pile of veins and nerves

The liver goes into a bowl with a little salt and some sweet wine. I used the traditional Sauternes, but Bocuse and others call for Port. I suspect that any sweet, deeply flavorful wine will work just as well. Once well mixed the liver goes into the refrigerator for a couple hours.

Then you just jam everything into a small (that’s a 3 cup) terrine lined with plastic wrap.

And into a bain-marie in a 200° F oven until the internal temperature reaches 115° F.

Pour off the tasty duck fat and save it for fried potatoes. Press the contents of the terrine for a couple hours, then back into the ‘fridge for a couple days.

While the terrine is settling in, make the Sauternes Jelly. If, like me, you bought half a bottle of Sauternes you’ll have almost exactly the right amount left over to make Sauternes Jelly.


Two days resting in the 'fridge and there you have it!

Saturday, December 20, 2014

Chili Chocolate Bars


This is an incredibly delicious (and easy) recipe for miniature chocolate bars inspired by the ones from elBulli 2005-2011.  It has just 4 ingredients and takes maybe half an hour to make.


Chili Chocolate Bars
Recipe by William Colsher

Ingredients
  • 125 grams Sugar
  • 2 Tbs Water
  • 1-2 grams Aleppo Pepper Flakes
  • 225 grams 74% Chocolate

  • Cooking Directions


    1. Combine the sugar and water in a small saucepan.


    2. Over medium heat bring the mixture to a boil.


    3. Continuing boiling until a golden caramel forms.
    4. Remove the pan from the heat and let it cool slightly.


    5. Carefully stir in the Aleppo Pepper flakes and pour the caramel onto a silpat. One gram of Aleppo Pepper flakes will give the chocolates a pretty subtle heat so adjust the amount of pepper to your tastes.
    6. When it has hardened break it into large pieces and store them in an airtight container.


    7. Temper the chocolate using the water bath method.


    8. While the chocolate is tempering mill the caramel to a coarse powder and return it to the container.
    9. When the chocolate is tempered, open the bag and pour it into the caramel container.
    10. Fold the two together. Be sure to scrape up the caramel powder lurking in the corners of the container.


    11. Pour a blob of the chocolate onto a mini-bar mold and smooth it into the forms with an offset spatula.
    12. Set the filled mold in a cool dry place to set.


    13. Release the bars from the mold, trim, and serve.
Notes:

One gram of Aleppo Pepper flakes will give the chocolates a pretty subtle heat so adjust the amount of pepper to your tastes.

This recipe makes enough chocolate to fill three of the little mold that I used. If, like me, you only have one mold you can just float the container back in the water bath while each batch sets up. Be sure to dry it carefully before you open it for the next batch.

Thursday, November 20, 2014

Thermomix Hummus

Za'atar Spiced Shrimp & Thermomix Hummus
There are about a billion Thermomix hummus recipes floating around the internet. This one is a Thermomix adaptation of Michael Solomonov's well known recipe.


Hummus
Recipe by Michael Solomonov, Adapted by William Colsher
  • 225 grams Dry Chickpeas
  • 8 grams Baking Soda
  • Half head Garlic, skin on
  • 170 grams Tehini paste
  • 55 grams grape seed oil
  • 28 grams Fresh Lemon Juice
  • To Taste Salt
  • To Taste Cumin
Cooking Directions
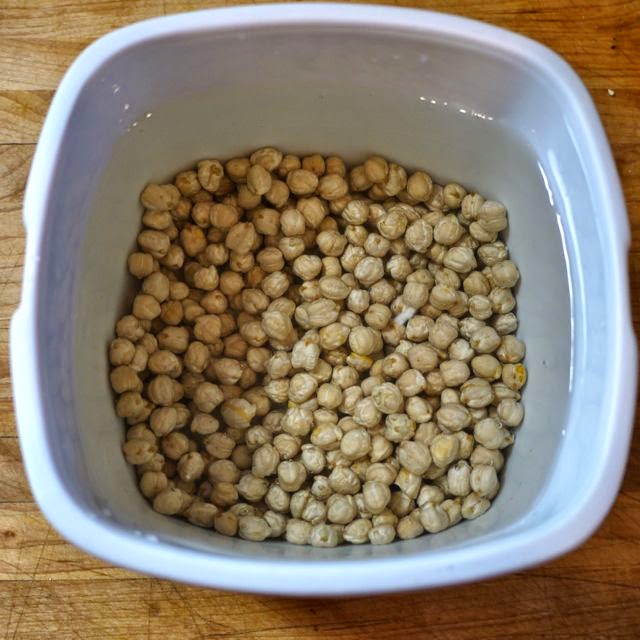
  1. Dissolve the baking soda in 1 liter of cold water.


  2. Place the chickpeas in a deep container, pour in the water (the chickpeas should be covered to at least twice their height) cover the container and refrigerate for 18-24 hours.
  3. Drain and rinse the chickpeas. Place them in the Thermomix simmering basket along with the half head of garlic.
  4. Fill the Thermomix bowl with water so the soaked chickpeas are completely submerged.
  5. Cover the Thermomix bowl, bring the water to a boil at Varoma/Stir then reduce the heat to 100°/Stir.
  6. Every 15 minutes or so you might want to skim the water. This is completely optional. 
  7. Cook until the chickpeas are completely tender. Start checking them after about 45 minutes. If they take more than an hour to cook, buy them somewhere else next time.
  8. When they're cooked, lift out the basket and reserve the cooking liquid.
  9. Dump the cooked chickpeas back into the Thermomix. Add the tehini paste, grape seed oil, and lemon juice and about 100 ml of the reserved cooking water.

  10. Not Ready Yet - Add More Cooking Liquid
  11. Replace the cover and begin processing the ingredients at speeds no higher than 3. You'll have to scrape down the sides a couple times until it gets going.
  12. Continue processing the hummus at successively higher speeds, adding additional cooking water as needed.You want to get to the point where the hummus stays on the blades at speed 5.

  13. That's More Like It.

  14. Process on speed 5 for about 2 minutes. The goal is light, smooth paste with virtually no lumps.
  15. Add salt and ground cumin to taste.
  16. Serve with your choice of protein or simply garnished with good olive oil and a squeeze of lemon.

Sunday, May 25, 2014

Lobster Eggs Benedict


Lobster Eggs Benedict is probably the most complicated thing I'd ever want to make for breakfast. Even so, it's not particularly difficult and by cooking the lobster sous vide the potential horror of rubbery, overcooked lobster is effectively eliminated. Here's how to do it:

Saturday, March 29, 2014

Stuffed Chicken Puttanesca


Stuffed Chicken "Puttanesca"
Recipe by William Colsher

In this recipe I've turned the ingredients used in "puttanesca" sauce into a stuffing for an otherwise bland piece of supermarket chicken.

Prep time: 20 minutes plus up to 24 hours idle
Cook time: 2 hours
Yield: 2 servings

Ingredients
  • 1 Large (about 350 grams) Chicken Breast Half
  • 90 grams Black Olive Puree
  • 15 grams Capers, rinsed and chopped
  • 5 grams Garlic, minced
  • 5 grams Parsley, chopped
  • To Taste Hot Pepper Flakes
  • Transglutaminase-RM 

  • For the Polenta

  • 1/2 Cup Corn Meal
  • 2 cups Chicken broth or water
  • 1/4 cup Freshly grated Parmigiano Reggiano
Cooking Directions
  1. Cut the chicken breast in half horizontally. Lightly flatten the pieces.
  2. Combine the black olive puree, capers, garlic, parsley, and pepper flakes and mix well.
  3. Place the olive mixture in a line down the center of one of the chicken breast halves.
  4. Sprinkle Transglutaminase-RM around the edges of both breast halves and press them together gently.
  5. Transfer the breast halves to a sheet of plastic wrap and roll then tightly together to form a neat cylinder.
  6. Tie off the ends and wrap & tie as tightly as possible a second time.
  7. Place the chicken package in the refrigerator overnight.
  8. Preheat a water bath to 140F.
  9. Place the chicken package in a ziplock bag and remove as much air is possible using the displacement method.
  10. Cook the chicken in the water bath for at least 2 hours. 
  11. While the chicken is cooking prepare a batch of polenta using the corn meal, broth, and cheese. Pour the cooked polenta into a 9x9 pan lined with plastic wrap. Give it a good bang on the counter to settle the polenta into the corners and set aside to cool and firm up.
  12. When ready to serve, lift the polenta sheet out of the pan and cut 6 disks slightly larger than the diameter of the chicken roll. Brown them on both sides in a little olive oil and keep warm. Be patient. The polenta disks will be very soft. Let the cheese do it's thing and crisp up.
  13. Warm a small pan of basic tomato sauce.
  14. Remove the chicken from the water bath and carefully unwrap it. Trim the ends and carefully cut it into 6 slices.
  15. Spoon three pools of tomato sauce onto a large plate, top each with a polenta disk and a piece of the chicken.
  16. Drizzle on a little more tomato sauce and repeat for the second serving.


Thursday, March 27, 2014

An elBulli Snack: 1107 Black Olive Oreo with Double Cream


Even the "easy" recipes in the new elBulli 2005-2011 volumes come with challenges. Most of the time those challenges involve one (or both) of two factors:
  • Sourcing Ingredients
  • Time
The Black Olive Oreo snack involves both. The ingredients I had trouble with were the 220 gram jar of black olive puree and double cream. Living in a major city you wouldn't think either would be much of an issue, but it turns out that while quite a few places sometimes stock double cream, it's availability can be pretty spotty. Black olive puree? Should be easy in a town with the Italian roots of Philly, but no. Lots of places have small jars of olive puree but they all seem to to be some version of tapenade with capers, anchovies and whatnot added. The recipe and more below...

Tuesday, February 11, 2014

Another Modernist Style Dinner: Agave-Chile Glazed Chicken with Lentil Salad

I've been a lazy poster lately so I figured I'd write up Sunday's dinner, a super easy "modernist" style meal of sous vide chicken breast  with agave-chile glaze and the Lentil Salad from Modernist Cuisine at Home.


Agave-Chile Glazed Chicken Breast


Recipe by William Colsher

Ingredients
  • 1 Large Chicken Breast Half (about 8 oz.)
  • 3 Tbs. Agave syrup
  • 1 Tbs. Ancho (or other) Chile powder
Cooking Directions
  1. Pre-heat a water bath to 135 F.
  2. Trim the chicken breast of excess fat and sinew and vacuum seal in a sous vide safe bag.
  3. Place the sealed chicken in the water bath.
  4. Cook for at least 3 hours 15 minutes to insure pasteurization.
  5. Leave the chicken in the running bath until ready to serve.
  6. Combine the agave syrup and chile powder.
  7. Pre-heat your broiler on high.
  8. Remove the chicken from the bath and bag. Dry it carefully on a paper towel.
  9. Place the chicken skin side up on a small oven safe pan and baste it with a little of the glaze.
  10. Place the pan under the broiler for a minute or so. Watch it carefully as the glaze will burn very quickly. Baste and broil several times until you have a nice glaze built up.
  11. Slice the breast on the bias and serve over Modernist Lentil Salad.


Pressure-Cooked Lentil Saad

Recipe Adapted from Modernist Cuisine at Home
Yield: 6 servings as a salad, 4 as part of a main course
Ingredients
  • 200 g Dry Lentils
  • 85 g Carrots
  • 70 g Leek
  • 50 g Sweet Onion
  • 50 g Shallot
  • 50 g Celery
  • 8 g Garlic
  • 2 g Black Peppercorns
  • 1 g Thyme
  • 1 Bay leaf
  • 750 ml Mineral Water
  • 85 g Your Favorite Vinaigrette
  • 80 g Fuji Apple, diced fine
  • 95 g Walnuts, diced fine
Cooking Directions
  1. Place the lentils in a bowl and cover with cold water for 2 hours.


  2. Slice the vegetables thin and wrap them in cheesecloth with the peppercorns and herbs.


  3. Drain the lentils and place them in a pressure cooker with the water and package of aromatics.
  4. Seal the pressure cooker and cook on high for 7 minutes.
  5. Let the cooker cool until it can be opened or depressurize it according to the manufacturer's directions.


  6. Discard the aromatics, drain the lentils and spread them on a tray to cool.
  7. When the lentils have cooled, place them in a bowl and gently mix in the vinaigrette, apple, and walnuts.

Notes:

Vinaigrette: Modernist Cuisine At Home has a rather elaborate vinaigrette recipe. You want one that's slightly sweet. Use a white wine vinegar.

Lentils: Use whatever you have. I use Bob's Red Mill French Green Lentils both because they're excellent and also because Bob Moore is a good guy.

Apple and Walnuts: you want the dice to be about the same size as the cooked lentils.

Temperature: As part of a regular salad you should probably chill the lentils. I served them warm under the chicken.

Modernist Cuisine at Home: a frighteningly expensive cookbook, even at Amazon. If have have an iPad, get the free "Inkling" app and check out the free sample chapters.

Monday, January 20, 2014

Stuffed Chicken Breasts with Mushroom Ragout

Stuffed Chicken Breasts with Mushroom Ragout
Recipe by William Colsher


This recipe was inspired by the "Rouelle of Four Story Hills Farm Poularde" in Thomas Keller's Under Pressure and the need to use up a batch of Modernist Cuisine At Home's "Shiitake Marmalade".

The dried mushrooms I used in the Mushroom Ragout are the "Forest Mix Mushrooms" from Chef Depot. Their website is a bit on the primitive side but service is excellent and the mushrooms are a bargain at $16.95 a pound.

The immersion circulator I use is the Anova model. It's inexpensive (relative to others) and works beautifully.

Ingredients
  • 2 Chicken Breast Halves
  • 4 Tbs Shiitake Mushroom Marmalade (recipe below)
  • Salt
  • Pepper
  • Transglutaminase RM
  • Mushroom Ragout (recipe below) 
Cooking Directions
  1. Carefully trim all excess fat and connective tissue from the chicken. Gently flatten the breast halves.
  2. Place the breast halves skin side down on an 18 inch sheet of plastic wrap. Season lightly with salt and pepper.
  3. Spread the mushroom ragout down the center of one of the breast halves.
  4. Carefully sprinkle the transglutaminase around the edges of the  mushroom breast half.
  5. Cover the mushroom breast half with the the other one, tucking it under so it makes solid contact with the transglutaminase coated areas.
  6. Roll the breasts as tightly as possible into a cylinder. Tie off the ends. Place the cylinder in an airtight container and refrigerate overnight.
  7. Place the chicken cylinder, still sealed in plastic wrap, in a sous vide bag and seal, removing as much air as possible without deforming the cylinder.
  8. Heat a water bath to 62 C and cook the chicken cylinder for 90 minutes.
  9. Remove the chicken cylinder from the water bath and unpack it. Gently dry it with paper towels.
  10. Carefully slice the cylinder in 1 cm. disks. 
  11. Place a bed of mushroom ragout on a plate and arrange three slices of the chicken on top.
  12. Spoon some of the mushroom gravy over the slices. 
  13. Serve with roasted potatoes


Shiitake Marmelade

Adapted from Modernist Cuisine At Home
Ingredients
  • 300 g Shiitake Mushroom Caps
  • 60 g Unsalted Butter
  • 60 g Shallots, finely minced
  • 100 g Water
  • 36 g Soy Sauce
  • 4 g Honey
Cooking Directions
  1. In a food processor fitted with the steel blade mince the mushroom caps. Pulse carefully - don;t let them become a puree.
  2. Melt the butter in a saucepan over medium heat and cook the mushrooms, stirring occasionally, until they are lightly browned and rather dry.
  3. Add the shallots to the pan and cook, stirring occasionally, until they are softened and translucent.
  4. Add the water, soy sauce and honey to the pan and stir to combine.
  5. Simmer until the mixture is slightly thickened.


Mushroom Ragout

Recipe by William Colsher
Ingredients
  • 1.5 oz Mixed dried mushrooms
  • 2 Tbs Shallots, finely minced
  • 2 cups Chicken Stock
  • 2 Tbs Unsalted butter
  • 2 Tbs AP Flour
  • Salt
  • Pepper
Cooking Directions
  1. Pick over the mushrooms and rinse quickly under running water then place them in a heatproof bowl.
  2. Bring 1 cup of the chicken stock to a simmer and pour it over the mushrooms. They should be completely covered. If necessary set a smaller bowl in top to hold them under the liquid.
  3. Let the mushrooms soak until they are completely softened.
  4. Lift the mushrooms out of the stock and chop coarsely. Reserve the soaking liquid.
  5. In a small saucepan melt the butter over medium heat, then add the shallots and cook until they have softened and become translucent. 
  6. Add the flour and cook, stirring, for a few minutes until the flour begins to color.
  7. Add the mushrooms to the roux and stir to combine.
  8. Carefully strain in the reserved mushroom soaking liquid, stirring and add the remaining chicken stock
  9. Bring the mixture to a boil, reduce the heat and cook until slightly reduced and thickened.
  10. Season to taste.


Friday, December 27, 2013

Baking Steel Naan


Naan

Recipe Adapted from Neelam Batra, 1000 Indian Recipes

Yield: 10 Naan
Ingredients
  • 7 g Dry Yeast (1 packet)
  • 5 g Sugar
  • 60 g Warm Water
  • 220 g Plain Non-fat Yogurt
  • 20 g Vegetable Oil
  • 330 g AP or Bread Flour
  • 2.5 g Kosher Salt or to taste
  • Bench Flour
  • Melted Butter or Ghee
Cooking Directions
  1. Place the Baking Steel on a shelf at the second level below your oven's broiler. Preheat the oven to 500 or 550 F.
  2. Combine the yeast, sugar and warm water in a small bowl.
  3. When the yeast mixture is frothy combine it with the yogurt and vegetable oil. Whisk until a smooth homogenous mixture is achieved.
  4. Place the flour and salt in a food processor fitted with the metal blade. Cover and pulse once or twice to combine.
  5. Add the yogurt mixture and process until a smooth ball is formed. It should be quite soft and a little sticky. If necessary, add a little more flour (if too wet) or yogurt (if too dry) and continue to process.
  6. Place the dough ball in a lightly oiled bowl, rotating to coat it with oil, cover with foil, and allow it to double in volume, about 1 hour in a warm kitchen.


  7. When the dough has doubled in volume, lightly flour your work surface and hands and roll the dough into a a log about 10 inches long.
  8. Cut nine 12 inch squares of wax paper.


  9. When the oven is preheated cut the log into 10 sections.
  10. Roll out each ball into an 8 inch disk. Stack each naan, separated by a piece of wax paper. Cover the pile with the damp towel.
  11. Switch the oven to broil.


  12. Stretch the first naan into the characteristic triangular shape.
  13. Carefully toss the naan onto the Baking Steel.

  14. 15 Seconds

    60 Seconds

  15. Cook for about 90 seconds. Adjust the naan's location with tongs to optimize browning.
  16. Remove the naan with tongs, brush generously with melted butter and set aside, covered.
  17. Continue until all are cooked.
  18. Serve hot.

Notes: 

Quantities: The original recipe is expressed in cups and teaspoons and is, perhaps, somewhat inaccurate. (If you have Batra's book, you'll see that I used considerably more yogurt.) I weighed everything out as I measured for this version. Use caution and good sense if you choose to give it a try. As always with bread recipes, the exact amount of liquid will vary somewhat depending on you flour, the weather, and the whims of Hestia.

Flour: I used King Arthur Bread Flour.

Tuesday, December 24, 2013

Dinner the Modernist Way: Squash Soup, Flat Iron Steak and Roasted Potatoes

Cooking
Well, this whole Modernist Cuisine thing has got me hooked. At first it looks like a lot of effort, especially if you come to it by way of Thomas Keller and Ferran Adrià. But in reality a lot of things require less effort than their conventional counterparts. This meal is a good example - the hardest part is peeling the squash - everything else is "set and forget".


Squash Soup

Recipe Adapted From Modernist Cuisine At Home
Ingredients
  • 500 grams Butternut Squash, peeled and diced
  • 18 grams Lemongrass, sliced thin
  • 113 grams Unsalted Butter
  • 30 grams Water
  • 5 grams Salt
  • 2.5 grams Baking Soda
  • Coconut Milk
Cooking Directions
  1. Over medium heat melt the butter in the pressure cooker.
  2. Combine the water, salt and baking soda in a small bowl.
  3. Add the squash, lemongrass, and salt mixture to the pressure cooker. Mix well.
  4. Seal the pressure cooker and cook at 15 psi for 20 minutes. If you're using an electric pressure cooker like mine, cook on high pressure for 30 minutes.
  5. Carefully shake the pressure cooker two or three times while cooking to prevent sticking.

  6. Cooked Squash

  7. When the cooking time has elapsed, carefully release the pressure and transfer the contents to a blender.
  8. Blend at high speed, adding enough coconut milk to produce a smooth creamy soup.
  9. Strain through a fine sieve (this removes any woody bits of the lemon grass) and serve hot.

Perfect Steak


Sous Vide Flat Iron Steak

Recipe by Michael Callahan
Yield: 4 servings
Ingredients
  • 1 Flat Iron steak, about 1.25 lb
  • 1/4 cup Balsamic Vinegar
  • 1 Tbs Garlic Powder
  • 2 Tbs Extra Virgin Olive Oil
  • 1 Tsp Mustard powder
Cooking Directions
  1. Preheat your water bath to 130 F.
  2. Carefully trim the steak, removing excess fat and connective tissue.
  3. Combine the vinegar, garlic powder, olive oil and mustard in a container large enough to hold the steak.
  4. Add the steak and turn to coat it with the marinade.
  5. Allow steak to marinate 30 minutes.
  6. Vacuum seal the steak.
  7. Cook in the water bath for 3 hours
  8. Remove the steak from the cooking bag and wipe it dry.
  9. Quickly sear the steak, about 30 seconds on each side.
  10. Slice thin across the grain and serve hot.


Roasted Potatoes

Recipe by William Colsher
Yield: 2 servings
Ingredients
  • 8-10 Small "new" potatoes
  • Salt
  • Pepper
  • Fresh Rosemary, chopped
  • Extra virgin olive oil
Cooking Directions
  1. Pre-heat oven to 400 F
  2. Halve or quarter the potatoes.
  3. Combine salt, pepper, rosemary, and olive oil in a bowl large enough to hold the potatoes.
  4. Add the potatoes to the bowl and toss to coat with oil and seasonings.


  5. Spread the potatoes in a single layer on a baking sheet and roast for 15-20 minutes or until the potatoes are browned and tender.
  6. Serve hot.


Notes:

Pressure Cooker: 1) Modernist recipes typically specify 15 PSI for pressure cooking. However, most electric pressure cookers (like mine) only come up to 11 PSI on their "high" setting. They work perfectly but do require a little extra time. I cooked the squash in this recipe for 30 minutes with excellent results.  2) You cannot make this recipe in an old fashioned "jiggler weight" cooker. You'll lose too much steam and the squash will burn.

Butternut Squash: 500 grams is about half a typical butternut squash. The extra can be frozen.

Coconut Milk: How much you need will depend on how moist the squash is. I ended up using almost the whole 12 oz can.

Flat Iron Steak: A typical flat iron steak is about 1.25 - 1.75 pounds. Because very little weight is lost when cooking sous vide you can get 4 "normal" servings from a single steak. After the cooking is complete you can just toss half in the freezer with the left over squash.

LinkWithin

Related Posts Plugin for WordPress, Blogger...