So I hit the www.dripworks.com website, figured out what I'd need and ordered:
| 1 | 12100 | 1/2" Mainline Blank Tubing (.600 ID, .700 OD) - 1/2" x 100' Blank Tube | $13.50 |
| 1 | 1250 | 1/2" Mainline Blank Tubing (.600 ID, .700 OD) - 1/2" x 50' Blank Tube | $8.50 |
| 20 | 14GP2 | 1/4" Goof Plugs For Repair | $1.20 |
| 1 | 1450 | 1/4" Polyethylene Micro Tubing (.170 ID, .250 OD) - 1/4" Tubing x 50ft | $3.70 |
| 30 | 14LTB | 1/4" Transfer Barb - 1/4" Long Transfer Barb | $4.20 |
| 1 | DSD6L | Dripline 6" Spacing, 1/2 GPH - 1/4" Soaker Drip 6" 50' Roll | $15.50 |
| 2 | ELL | Easy Loc Elbow | $2.60 |
| 7 | ELMC | Easy Loc End Cap | $6.30 |
| 1 | ELFH | Easy Loc Female Hose Beginning | $1.05 |
| 7 | ELT | Easy Loc Tee | $11.55 |
| 1 | PUPKT | Pocket Punch | $5.95 |
| 30 | DTA1 | Take Apart Emitter - Take Apart Emitter-1 GPH (black) | $6.60 |
| 20 | SUHD | U Shaped Wire Hold Downs | $3.00 |
Subtotal: $83.65 Shipping Rate: $17.00 Total: $100.65 | |||
Yeah, a hundred bucks. And I left out a couple more expensive items like the pressure regulator and a timer that I'll probably add next spring. Plus I've probably more "main line" tubing and fittings than most people would need because our 4 little beds are at the corners of a 15 x 50 foot rectangle so the basic layout is a big "U" shape. On the other hand a more traditional row type garden would use more of the rather expensive dripline - I'll use less than half of the 50 foot roll.
Here's how it's laid out...
Faucet and Zucchini:
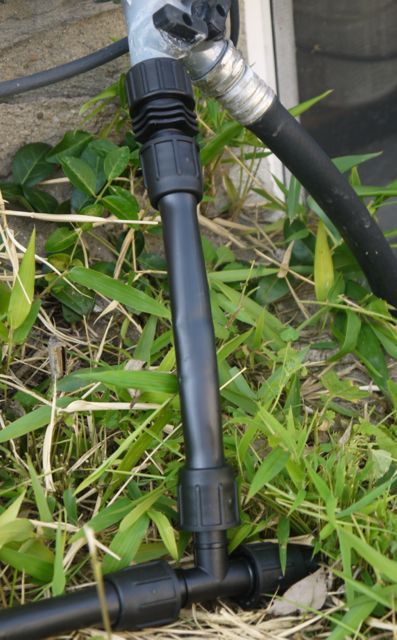 |
| Hose Beginning and T |
 |
| Main Line, two emitter lines, and an end cap |
 |
| Elbow, End Cap, T |
 |
| Emitter, Transfer Barb, Wire Hold Down |
The end of each of the 1/4 inch lines has a 1 GPH (gallon per hour) emitter that drips directly to the zucchini root area. They're held in place with a couple wire hold downs.
 |
| Emitter and zucchini stalk - a wire hold is down just out of frame to the right. |
I'd hoped to get more done today, but it's about 97 degrees out there and just too hot for an old fat guy like me to work very long. It should cool off a little by Thursday so with a little luck I'll get the next segment installed and written up in a couple days.
The first little piece of the system works perfectly. The parts are very easy to work with - the hose is simple to cut with a work knife or a pair of shears. Unless you have strong young fingers you'll need a pair of pliers to grab the transfer barbs and insert them into the main line tubing after you punch the holes.
The only actual "problem" so far is that the hose beginning doesn't have a washer, so I'll have to grab some at the hardware store before I put the next segment together. I'll also order a pressure regulator because it's darn hard to set low enough flow using the faucet.
Coming Soon: Part 2: Upper New Bed & Old Bed
No comments:
Post a Comment